Tutorial
Intro
This tutorial will walk you through setting up Cogate and using it to test and merge pull requests. It is based around a microservice model with two projects: a client and a server. So that we have something to run, the examples here implement a simple REST-based calculator – the client submits a request to perform a mathematical operation, and the server executes it and returns the result. Each of these runs as a pod in a Kubernetes cluster.
This tutorial also assumes a model where developers collaborate on a shared repository by submitting pull requests from their personal forks. Cogate doesn’t require that (you can use a single repo with developer branches), but it is the simplest and clearest way to see all the moving parts, so it’s what we use here.
Start by forking these example repositories to an organization you manage on GitHub:
Then fork those repositories to your own account. Now you’re ready to start!
Create an Account
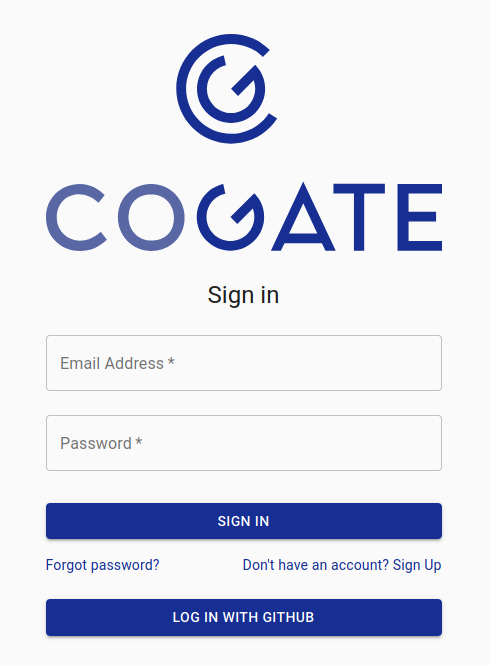
The easiest way to use Cogate is to go to https://cogate.dev/ and log in with a GitHub account. A single GitHub account can have access to multiple Cogate accounts as you will see later. However, you can create a dedicated Cogate account if that’s your cup of tea by clicking the Don’t have an account? Sign Up link. Otherwise, hit Log in with GitHub.
Once that’s done, you’ll see the Cogate dashboard with a notification in the top telling you to update your payment information:

Hit the button. This will take you to the Settings page.
Set up Payment
When you logged in to Cogate, you registered as a User and also created an Account. The user is you, personally, and the account will have access to projects and builds. You can grant account access to other users, and you can create multiple accounts, each of which is completely separate.
The new account which was created by default has your name, but you can change it here to something more meaningful. Let’s change it to Yoyodyne since that’s our company name. Add an email address too. It can be yours or some other address. Cogate will send service and billing updates for this account to that address.

Check your email (and spam folder, sigh) for a validation email. Once that’s squared away, update your payment information in the section below. When you’re done, the page should look like this:

Add a Project
We need to tell Cogate which projects to watch for new pull requests and build. Click on the Projects navigation link and look for the + action button at the bottom right.

Click that and you’ll be sent to a GitHub page to install the cogatedev app.
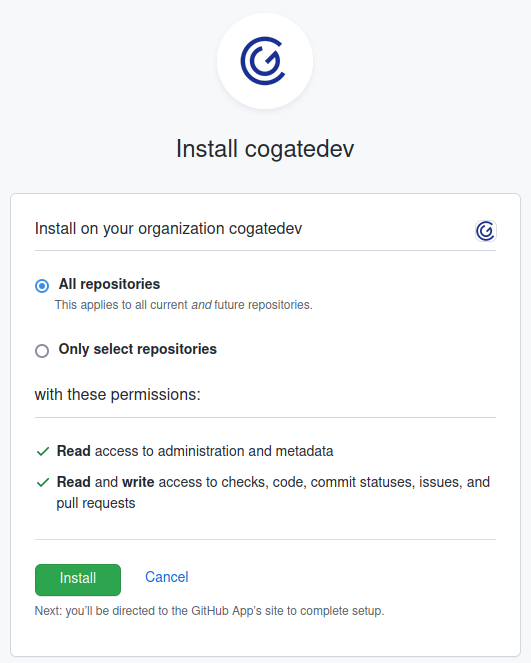
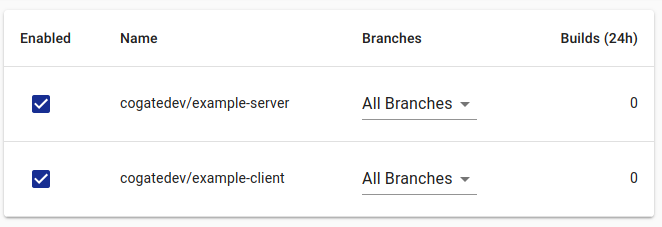
It’s easiest to install it for All repositories since you can easily enable or disable it within the Cogate app, but you can also select the repositories here as well. Once you install it, you’ll be directed back to the Cogate projects page, and your repositories should be visible.
Configure Image Builds
Create a .cogate.yaml file in the root of the calculator-server
project:
- image:
    registry: docker.io
    repository: example/calculator-server
Push it up to your fork of the calculator-server repo and open a pull request. You should shortly see a check in progress on GitHub, and a build in progress on Cogate.

While the build is in progress, or after it is complete, you can click on the link to see the build information and logs.
We built an image! You might be tempted at this point to click on the Images or Deployments links in the dashboard and then wonder why this image doesn’t show up there. You’re already seeing Cogate’s speculative execution in action. We haven’t actually merged the pull request to add the cogate configuration yet, but Cogate still ran the job as if we had. It will show up later when we merge the PRs.
Configure Deployments
Now that that is complete, let’s build our client image and deploy the
whole system. Add the following to a new .cogate.yaml, this time
in the calculator-client project.
- image:
    registry: docker.io
    repository: example/calculator-client

- deployment:
    name: deploy-calculator
    images:
      - docker.io/example/calculator-server
      - docker.io/example/calculator-client
    platform: k8s-1-node
    apply:
      path: deploy.yaml
      wait:
        resource: job/calculator-client
        for: condition=complete
        timeout: 60s
This tells Cogate to do two things: first, build the client image.
Then, once that is done, to kubectl apply the contents of
deploy.yaml onto a one-node Kubernetes cluster and wait for the
calculator-client job to complete. That will exercise the entire
system, client and server.
Create a PR with that new commit, but this time in the PR description we’re going to tell Cogate that this commit depends on the commit that we made earlier to the server repo. Copy the URL for the server pull request from earlier, and paste it into the PR description for this new client commit. It should look something like this:
Depends-On: https://github.com/cogatedev/calculator-server/pull/1
Once you open that pull request, Cogate will start building the server
image, and then once that is complete, it will deploy both the client
and server using the deploy.yaml in the client repo.

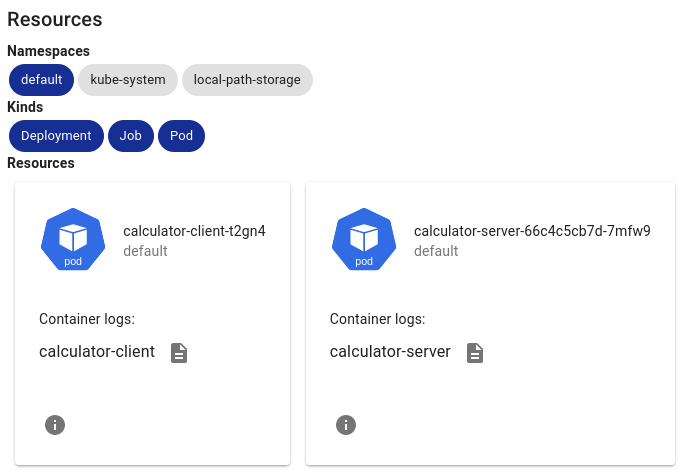
You can click on the build results as before. If you click on the results for the deployment job, you can see links to the image builds that the deployment job used.

You can also see that Cogate natively understands the Kubernetes resources that the deployment job created. Click on any of those to see the Kubernetes resource information or container log files.
We have now tested pull requests to two different git repos and container images, and seen them work together in a production-like deployment before we merged either of them!
Since we’re happy with them, we can go ahead and merge them. Just hit
the “Merge pull request” button on GitHub, and shortly you should see
the images and deployments show up in Cogate under the Images and
Deployments menu items.
If this is all you want from Cogate, you’re done!
Cogate can do more though, so keep reading to learn about Cogate’s namesake feature: gating.
Gating Pull Requests
Cogate can help you avoid merging broken code with gating. The gating process does a few things:
It runs the tests again, with the latest version of the git repo. That way if any commits have merged since the original tests, they will be reflected. This can save your day when something you didn’t think could impact your code merges ahead of you.
It sequences any dependencies (like our client PR depending on the server PR above) and any other PRs which have been approved recently into a queue, but then runs all of the tests for every PR in the queue in parallel for speed. Every PR in the queue will run its tests with the PRs ahead of it included, so that whet gets tested is exactly what’s merged. If anything fails, it gets pulled out of the queue and the process restarts.
If you have configured registry credentials, as soon as the PR merges, the container image that was built for the gate test is pushed to the registry.
Configure Registries
If you configure registry credentials, Cogate will automatically publish container images as soon as PRs are merged. If you don’t want that, just skip this step; otherwise, carry on!
Select the Registries menu item in Cogate and press the + action button on the bottom right. Fill in the registry hostname, and your username and password and press Add. Done!
Since we’re actually going to publish to Docker Hub, make sure the
image repositories in all the config files match. If the
cogate.yaml files say example/calculator-client and
example/calculator-server, change those to be the actual Docker
Hub repository names now. Similarly, update the deploy.yaml file
in the client project to match.
Open a Pull Request
Let’s make a new change to exercise the gating process. Open up your fork of the calculator-client project and update the operands to new values. Change:
op := operation{Operands: []int{1, 3}}
to:
op := operation{Operands: []int{1, 4}}
Commit that to your fork in GitHub and open a new PR against the upstream project. You should soon see an image build job as well as a deployment job running.
Assuming those results look good, we’re ready to kick of the gating process. (Though in reality, you don’t have to wait for the check result, you can gate right away – gating makes it possible to “fire and forget” pull request approvals and still have a safe and working tree!)
Gate the Pull Request
To kick off the gating process, instead of clicking the Github Merge pull request button, do one of two things:
Leave a review that approves the PR.
Add the
gatelabel to the PR.
Ideally, you can configure the project in GitHub so that approvals are required. You can even remove the ability for most (or all!) developers to manually merge PRs so that only Cogate will actually merge them through its gating system.
But as an individual following this tutorial, you will notice that
GitHub does not allow a developer to approve their own PRs. This is
why Cogate also looks for the gate label.
Go ahead and add the gate label to the PR. You should see Cogate
start gating the change, and when the build and test deployments
succeed, it will merge.
After it merges, Cogate will run a promote build which will push the image it just built to the registry.
If you made it this far, you’re done! You’ve seen how to use Cogate
to test pull requests, gate them so you don’t merge broken code, and
promote images which have been validated in a test deployment to a
production registry. Go out there and start using it – and don’t be
afraid to use the Depends-On feature to test complex change
dependencies across all your projects!